How-to Guide
•
December 15, 2024
How to Permanently Disable Windows Defender with Defender Control
Learn how to cleanly and safely disable Microsoft Defender on Windows 10/11 using Defender Control. This guide covers prerequisites, tamper protection requirements, and validation checklists trusted by IT professionals.
Why disable Microsoft Defender?
Disabling Defender temporarily or permanently can be useful when you:
- Run a third-party enterprise antivirus that conflicts with Defender
- Need every ounce of performance for gaming, rendering, or data processing
- Operate lab machines or virtual machines with custom security stacks
- Transfer large files and want to avoid Defender scanning overhead
Why Defender Control?
- • 100% free, portable, and open source
- • Works on every modern Windows build (7 SP1 → 11)
- • Handles real-time protection, cloud scanning, and SmartScreen
- • Provides one-click restore functionality
- • Actively maintained by the Sordum community
Step-by-step installation
- Download the ZIP archive from Sordum.org or GitHub Releases.
- Extract the content to a folder you control (e.g.,
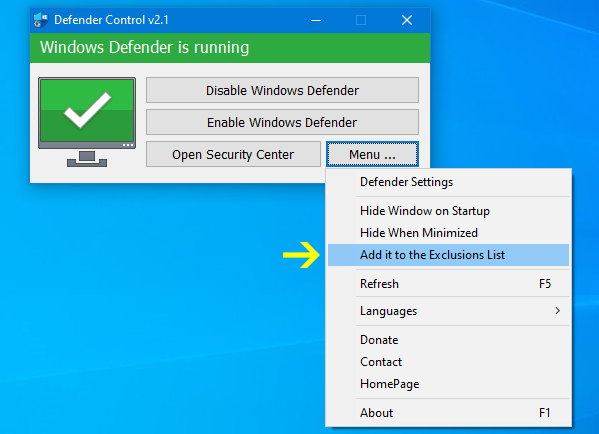
C:\Tools\DefenderControl). - Right-click
dControl.exeand choose “Run as administrator”. - Click “Add it to the exclusion list” inside the app to avoid false positives.
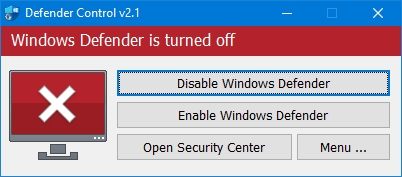
- Press “Disable Defender” and wait for the indicator to turn red.
- Restart Windows to commit the registry and service changes.
Verification checklist
- Windows Security dashboard shows protection settings as “Managed by your organization”.
Windows Defender Antivirus Serviceis stopped and disabled.- No new Defender definition updates download automatically.
- File transfers, compiles, or backups run without Defender interference.
Restoring Microsoft Defender
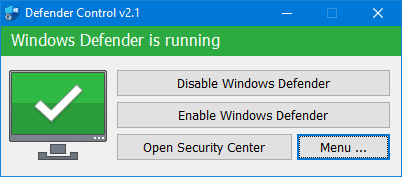
Need to turn Defender back on? Launch Defender Control, click “Enable Defender”, wait for the indicator to turn green, and reboot. All original registry keys, services, and scheduled tasks will be restored automatically.